BOOK COMPLIMENTARY IN-HOME or SHOWROOM CONSULTATION

How to Repair Flooring
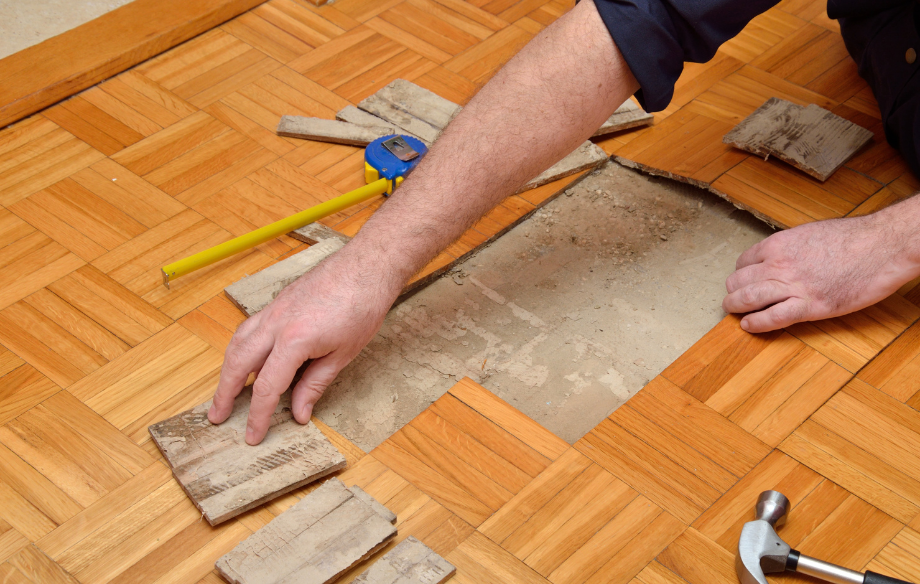
Step 1:Remove the Damaged Boards
Tools you will need to get the hardwood repair done: Circular Saw, Hammer, Cat’s Paw/Trim Pry Bar, Wood Chisel, Multi-Tool, Brad Nailer:
Pet stains or worn out boards will need to be replaces when they are beyond saving. First find the boards you will complete replace it.
- Mark the Boards – I mark the specific boards I will be removing very clearly along their entire length so there are no
mistakes.
- Determine Thickness – You need to find out how thick they are (this is important!). You need to know how thick the boards are so you can set the depth of the cut on you circular saw properly. Most old wood floors are between 1/2″ and 1″. The best place to find the depth is to remove a floor heat register or pull up a threshold. The threshold is less fun.
- Set Saw Depth – Once you know the thickness of your flooring, set your circular saw to just a hair deeper than the thickness of the flooring (about 1/32″).
- Cut 2 Lines – Make 2 parallel plunge cuts into the floor board along its length with the circular saw. Start and finish as close as you can to the ends without crossing into the next board. You’ll essentially be cutting the board into three slimmer boards. One piece will have the tongue, one piece the groove, and the middle piece will be free floating.
- Finish Cut With Multi-Tool – To finish the cut you need a multi-tool or chisel. Cut the small amount of wood remaining to the end of the board so that all three pieces of the board are completely independent of each other.
- Remove the Pieces – The middle piece should come out easily with a pry bar or even your fingers. The groove side will likely need a bit more coaxing with your pry bar. The tongue side will have been nailed down and so you’ll need to use the cat’s paw the either dig out the nails or simply tear the remaining piece out. This side usually breaks a few times on it’s way out.
- Clean Up – Vacuum out all the saw dust and make sure the tongue and groove of the remaining boards are clear of any remaining wood and in good shape.
Step 2: Install the Replacement Boards
Cleaned up and free of any damaged boards next you will need to patch the floor with your replacement boards. (Find the exact thickness of the hardwood floor) Here is how to get a board into place properly.
- Measure & Cut to Length – Measure the length you need to replace and cut your replacement to size. It will need to be tight so if anything don’t cut it short. Cut it long and sneak up on it if you must.
To replace just a few boards:
- Remove the Groove – You’ll need to remove the bottom half of the groove on your replacement board. I usually use a table saw to cut it off cleanly, but a wood chisel or hand plane will work fine. It doesn’t have to be pretty, just don’t hurt the top of the board. This is only to be done if you are replacing just a few boards. For larger sections see the instructions in the following section.
- Insert Tongue Side First – Insert the replacement piece tongue side first into the existing flooring. It will require some force to get it into place, but don’t be too aggressive. Sometime a piece of scrap lumber can be used as a beater board so you can gently hammer the piece in place with scarring the surface.
- Face Nail in Place – Once the board is seated properly and flush with the existing floor you can nail it in place. I put two 1 1/2″ brads on each end and then every 16-24″ alternating sides. Keep in mind that since we removed the bottom half of the groove, the only thing holding that side down in the nail. So you may need a couple more nails on the groove side if the board isn’t perfectly snugged down at first.
Step 3: Refinish the Repair
Once the boards are in place the only way to have a seamless match is to refinish the whole floor.
Site Map
CA License Number: 992853
Email Us
Follow
Business Hours
- Mon - Fri
- -
- Saturday
- -
- Sunday
- -


Santa Clarita Showroom
South Barrington Showroom
© 2024 SCV Floorsmith. All rights reserved.